CLICK HERE FOR FREE BLOG LAYOUTS, LINK BUTTONS AND MORE! »

Monday, December 27, 2010

Decorated Canvas

Well Christmas has come and gone yet again and I hope you all had a lovely day with your friends and family. We had a great day with both sides of the family throughout the day. It was a very busy day and I certainly crashed at the end of it. Unfortunately I was back to work on Boxing Day so the break was far too short.


The week of Christmas a dear friend of ours celebrated her 40th birthday and I wanted to make her something personal. I decorated a notebook and was really pleased with the end result. She was really pleased with the gift. I tend to give handmade gifts to only a few as some people don't seem to appreciate the time and effort that goes into making something like this. I know Vicky really appreciated this.


Today was a really wet day and it seemed the perfect opportunity to get in and finish a few UFO's that we all have in our craft room. I start my canvas long before Christmas and saw today as a perfect day to finish it. Originally I wasn't too sure about my colour choice but it turned out a lot better than I anticipated. The girls are fighting over whose room it will go in.


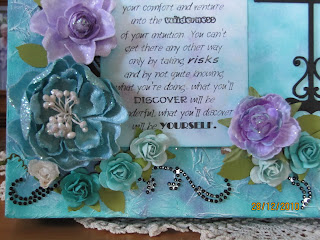
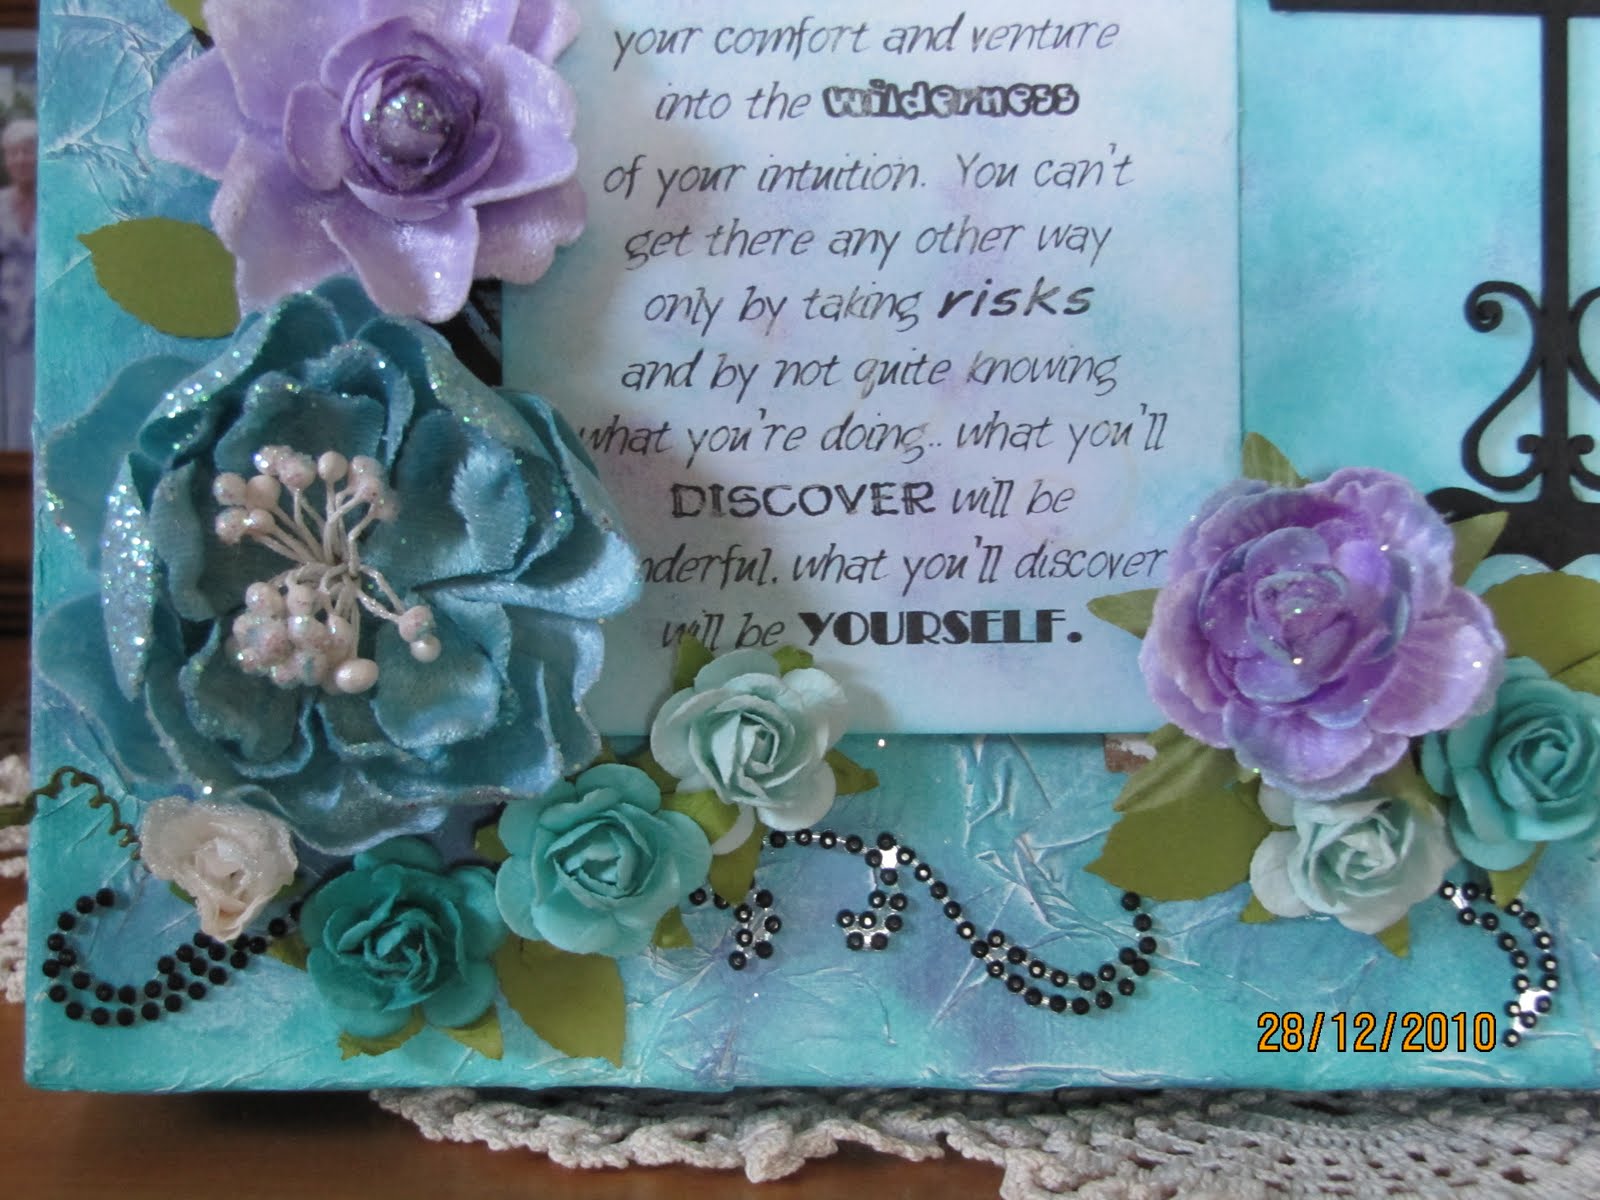
I typed the verse on the computer as I didn't have the stamp.
New Year is now fast approaching and I wish you all a happy and safe New Year


Tuesday, December 14, 2010

Christmas Tree

Last night I attended an online tutorial from Crafters Anonymous. We made this wonderful Christmas Tree. Unfortunately we were late in starting the class so it went a little late so I never got to completely finish my tree. I am eager to start another one and also decorate this one a bit more.


The next one I work on will perhaps have layers of different colours, I will post a photo when I have completed them.
Thanks Tia for a wonderful class and it was nice to chat with all the other ladies attending the class.

Sunday, December 12, 2010

Template for Gift Card

My recent post was for a Santa Stocking gift card holder. I Had a few comments requesting the template, if you go down to my previous blog entry and click on the blue highlighted word template it will take you through to the instructions.

Have fun making one of your own.

Saturday, December 11, 2010

Christmas Gift Ideas

I have been working on Christmas Gift Ideas this weekend. I always love to recieve something that has been hand made and I am sure my family are now accustomed to recieving hand made gifts from me. I think alot more thought goes into deciding on an item that suits the individual person.

I like to give vouchers to the nephews as they are of an age that is hard to know exactly what they want. Vouchers are a great way to go, then they can get something they really want.


It is a bit boring to just recieve a voucher in an envelope so I found a template (click on the word template to download the template for youself) to make a gift holder. This cute little Christmas Stocking is an awesome holder for a gift card. Just lift up the flap and reveal the gift voucher.


My friends father makes some awesome tissue box holders so I decided to purchase one and cover it for some more gift ideas. This one was so quick and easy to make. I painted around some of the edges that were going to be seen then covered it in pretty co-ordinating papers and cardstock.


I attached some flowers and some bling and was quite pleased with the finished look.


I am sure the recipients of these gifts will love them. I would actually love to keep the tissue box for myself but I guess I will just have to make another one.


Monday, December 6, 2010

Christmas cards

I attended a craft day held by Tania on Saturday. It was a really good day, I really enjoy these days and it gives me time to myself (without the kids) to get caught up on my projects. I decided that this day would be time to get some more Christmas cards done. I saw this card on a blog and decided to try my hand at it. It was a really fun card to make but it sure took a while to complete.

I used the top note die to make the shape inside the vehicle and around his bumper and a variety of other punches to like the scallop circle, oval and square punches.

I just love the finished product.


The next card I also found while I was surfing the net one day. I used the bird punch for Santas moustache, the oval and circle punches. I have hand cut a holly leaf.

This card was rather simple to make but again quite effective.


I will post more Christmas cards on my blog in the next couple of days.
Thanks Tania for a great day and look forward to next years events.

Sunday, November 21, 2010

Christmas Craft Day

Christmas is fast approaching so it was time for my Christmas craft day. On Saturday a few of us got together to work on some Christmas projects. It was an enjoyable day. I always enjoy getting together and teaching new techniques and ideas and I always get lots of inspiration from everyone else who attends.


I found a card on the internet for a folded Christmas Tree card. I made it from a 5 1/4" circle cut in half then folded to for the tree. Very simple but a very effective card. I made this one with the Jolly Holiday Designer Series Papers.


On every table I put a little sweat treat. I stamped little tags and attached them to a candy cane.


The main project for the day was a Tri-fold Album. This is a take on the Tri-fold card and extended it out to make an album. I made this using the Sweet & Sour Specialty papers. Mine is not quite complete in this picture, I still have to add one more photo and a few more emblishments and perhaps some journalling. I have used 3 6x4 photos and 2 sixe 2 up photos for this project.


I have been working on a few other Christmas Card ideas but will post them over the next few days.

Friday, November 5, 2010

Post it note holders

It has been a busy week in the McRobie house hold. Bluestone School held their annual Wearable Arts Competition last week and Ashleigh (left) and her friend Emma decided to enter. The theme they chose was Botanical Beauties. What an effort they both put in, they reused some silk flowers left over from the Crop for a Cause that was held for Breast Cancer, black polythene that was made into a dress and they made a beautiful paper mache flower for the dress that flowed down into a flower pot. They also make a paper mache hat that was also decorated with the silk flowers.


Emmas body was painted with a base of gold and some beautiful flowers to co-ordinate with the flowers on her dress.
It was such a great night, what an outstanding effort that everyone put in. Well done girls.

I have been making up lovely post-it note holders. These have been so quick and easy to make. They hold a post-it note pad which is just over 2.5" square and a wee holder for a pen on the left hand side.
The holder on the left was made using Very Vanilla cardstock and papers from the Sweet & Sour Speciality set and the two step owl punch.
The right hand one was made using the Jolly Holly Designer Series papers and the two step bird punch.


Monday, October 25, 2010

Back on deck

My apologies for not updating my blog. Life has been pretty hectic and perhaps I am still in holiday mode after my 6 weeks away in Canada and the States.
The new 2010/2011 Catalogue is just great, I am just loving the new Designer Series Papers and have used them in a lot of the cards I am working on at the moment. I have a link posted on my blog to connect you through to view the catalogue so for any of you who haven't yet had a look, click on the link.
I have been making a few cards using the Top Note Bigz Die. For this Christmas card I have glued narrow strips of Jolly Holiday Designer Series Paper to a piece of card then run it through the Big Shot Top Note Die. These papers are just beautiful and co-ordinate so well with Old Olive and Cherry Cobbler inks and cardstock. I have punched out a circle scallop and cut down on each scallop piece to create a daisy shape. I have used a rub on from the holly & Jolly pack for the centre of the flower.


This card has been created much the same as the Christmas card but I glued 1" squares to a piece of card before running it through the Top Note die. The papers are from the Designer Series Sweet & Sour Specialty. This paper pack would have to be my favourite. One side of the paper is glossy and just awesome. I have stamped the flowers from the Vintage Vogue stamp set and used the rock 'n roll technique. Very simple but very effective.


Saturday, July 31, 2010

Last Chance List

The Last Chance List has just been released and wow what a list.


I have attached a file for you to view.


If you are wishing to order from it please email me on paperstylist@gmail.com


The first of August is a very special day for us. We are flying out to Canada and the States today. This has been planned for 2 years now and finally the day has come. The family is so excited. We are staying with our very special friends over there who we haven't seen for 12 years.

I will try my best to keep my blog up to date however it may not be Stampin' Up related, just holiday shot.

I will be checking my emails regulary so if anyone wants anything please let me know.

Thursday, July 29, 2010

SENZ

Boy how time flies. It is now almost two weeks since SENZ, but I wanted to post some photos of the weekend. It was such a great weekend but somewhat full on. It was the first time I had met my fellow Stampin'up demonstrators Lisa Bullock, Craig Elms and Kayoko Daly and I really enjoyed working along side them. It is always good to get together and meet others who also enjoy the same interest and throw ideas back and forward. We can all learn so much from each other. Thanks guys for your awesome friendship.


This is a photo of Craig in our stand and Kayoko taking a make'n take.


I took a class on behalf of Dianne Bell-Robertson, who unfortunately couldn't make it. The class was making a Flag Album. It was a lovely small class, pictured here is Linda and Kerri.
The class was only 2 hours long but it was great to get the project finished in the time and even a bonus we got to make a card to match. Well done ladies, it was good to meet you both.


This was the front of the Flag Album. We used Old Olive and Soft Suede card stock and the stamp set Vintage Vogue. The papers were from the Designer Series Papers Cottage Garden. I tried to use most of the Old Olive papers.


This was a fun class to teach and I would love to make more of these to give away as gifts.


Tuesday, June 22, 2010

Deal of the Week #4

The deals have been going really well. It is now time yet again for another special. This week you will get up to 50% off a selection of embellishments.


Item Page Description Reg Price Sale Price
109113 149 Square Ice Rhinestone Brads $23.50 $14.10
109111 149 Circle Ice Rhinestone Brads $23.50 $14.10
109112 149 Square Fire Rhinestone Brads $23.50 $14.10
111848 150 Bashfull Blue 1" dble stitched $23.50 $12.93
grosgrain ribbon
109050 151 Certainly Celery 5/8" ribbon $17.95 $10.77


If you are interested in purchasing any of these specials email me on paperstylist@gmail.com


Tuesday, June 15, 2010

Deal of the Week #3

Well last weeks Deal of the Week went really well, so here's another one you will love.

This week you will get up to 50% off some wonderful stamp sets.


Item 113009 Pg 97 Enjoy Every Moment stamp set. Was $62.95 now $31.48


Item 115792 Pg 57 Greetings Eight stamp set Was $58.95 Now $29.48


Item 116330 Pg 78 Bella's Bloom stamp set Was $28.95 now $17.37


Item 114283 Pg 105 All Scallops stamp set Was $66.95 now $33.48


Item 114263 Pg 34 A Happy Heart stamp set Was 49.95 now $24.98


What a bargain!! If anyone is interested in purchasing any of these stamp sets give me an email Debbie on
http://paperstylist@gmail.co.

Wednesday, June 9, 2010

Deal Of The Week #2

Throughout the month of June, Stamp'n Up are bringing out a great deal every week.

With the deals of the week you will get up to 50% off a selection of products from the
2009-2010 Idea Book & Catalogue.

This weeks deal is:-


Tea Party Designer Series Paper. Was $19.95 now $11.97


Sweet Slumber Specialty Designer Series Paper. Was $27.95 now $18.17


Raspberry Tart Designer Series Paper. Was $19.95 now $12.97


Pink Flamingo Designer Series Paper. Was $19.95 now $12.97


Haiku Designer Series Paper. Was $19.95 now $11.97
This is such a great deal, but remember this deal finishes on Tuesday night, June 15th.
If you are interested in purchasing any of these papers please email me on
Check in here next Wednesday to see what the deal of the week is next week.


Saturday, May 29, 2010

Crop For A Cause

I was really fortunate to be able to take part in the Crop for a cause which was held last Saturday. The day was run by the wonderful Beck Caithness. Beck organised a 24 hour crop to raise money for breast cancer. What a wonderful day it was, Beck you are just outstanding. Beck had so many sponsors that helped with the day and an endless supply of spot prizes. I'm sure everyone walked out the door with a little gift. The hall had been decorated with wonderful pink balloons and a huge goodie bag for everyone who attended.

I was lucky to be able to have a display there for Stamp'n Up, Brigette from Creative Memories was there with a great display and Rachel Forrester from Embellishit was there with her wonderful shop.

Check out Becks blog for an update on the day http://www.cropforacause.co.nz/.
A wopping $1707.96 was raised on the day for breast cancer. What an awesome effort.
I took some photos on the day so everyone can see what a great day it was.


A competition was run on the day for the best decorated bra. There was an awful lot of effort put into them. Absolutely stunning. Helen, one of my lovely Stamp'n up ladies decorated this bra using some of our lovely butterfly stamps. Just incredible..


The winner of the best decorated bra was Steph with her wonderful ladybird bra and the runner up was Dianne.


I finally finished a project that I had been working on for quite a few weeks. I was really pleased with the finished product. For those of you wanted to see the completed page, here it is.


Thanks Beck for a great day and I am sure if you ever run one again there will be a lot of people queing up to get tickets to help out such a great cause.


Saturday, May 15, 2010

Cottage Wall Gift Wallet

What a great weekend to relax and work on those craft projects. I just love wet or cold weekends, it gives me an excuse to get into the craft room.


I have been working on a mini gift wallet made out of the Cottage Wall Designer Series papers and the Vintage Vogue stamps.


This has been a fun project to work on, but it has taken a while to complete. Each page has little pocket which I have put in a little voucher to redeem and a little inspirational quote.


I am pleased with the way it turned out and I am sure it would make a wonderful gift for that special friend.


Sunday, May 9, 2010

Happy Mothers Day

To all you mothers out there I hope you have all had a great day with your families.

I have had a great day, the girls surprised Bruce and I at 7am with a wonderful breakfast in bed. Although I can't stand crumbs in the bed it was a wonderful surprise and a great start to the day.

I decided I wanted to spend time with the girls this morning and do some fun baking. We decided to make some stained glass window cookies.


These were so much fun to make and the girls and I had a ball. I was a bit unsure how they would go and I was a bit concerned about burning the boiled lollies, but as you can see they worked a treat.


For anyone who is interested, here is the recipe:

225g butter, softened

275g sugar

1/2 tsp baking soda

1/4 cup water

500g flour

boiled sweets ( I used the Heards fruit boiled lollies) finely crushed

Cream the butter and sugar. Dissolve baking soda in water. Add to creamed mixture. Add flour to mixture. Roll dough out thinly. Cut with large cutter and cut centres out with small cutter. Avoid having too thin a border as these break easily..

Place cut outs on baking paper on a tray. Bake 180 dec cel for about 4 minutes. Remove from oven and add a generous amount of crushed sweets in centres. Bake for another 4 mins until sugar melts and bubbles and biscuits are lightly browned.

Let centres harden before removing from tray.

Have fun and enjoy the results.